Deploying an LLM App to AWS using Open Source Tools

Overview
In this article, we will explore how to deploy a RAG chatbot app that interacts with large language models(LLM’s) to a cloud provider such as AWS using GitHub Actions, OpenTofu, and Digger. We were extremely inspired by Wenqi Glantz' article and thought of creating a version of our own, with OpenTofu & Digger.
Prerequisites
Before you begin setting up and deploying the LLM RAG Chatbot App , make sure you have the following prerequisites in place:
- AWS Account: You'll need an active AWS account to provision and manage the cloud resources required by the Chatbot App.
- Github Account: Access to a Github account is necessary for implementing Github Actions and secrets for Chatbot App source code.
- Access to Chatbot App Source Code: Ensure you have access to the source code of the Chatbot App that you intend to deploy. We are using the source code available here.
- OpenTofu : OpenTofu will be used to automate AWS cloud infrastructure provisioning for the Chatbot App.
- Digger: Digger is used for orchestrating OpenTofu/Terraform within the Continuous Integration/Continuous Deployment (CI/CD) system.
Step by Step Instructions
Step 1: Set up AWS Account and Resources
- Create an AWS Account: If you don't have one already, sign up for an AWS account using this link.
- Set up AWS IAM User: Create an IAM user with appropriate permissions to deploy resources like EC2 instances, IAM roles for LLM app.
- Go to the AWS Management Console and sign in using your AWS account
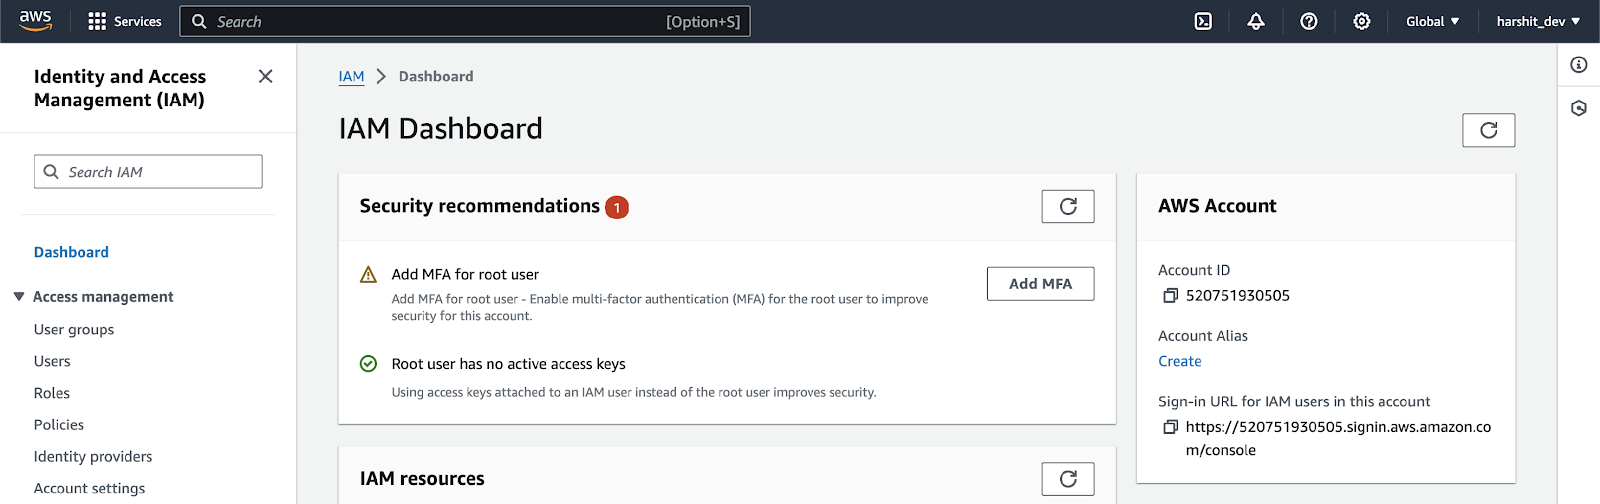
- Once logged in, navigate to the IAM console. You can find this under by searching for IAM in the search bar.
- You will be redirected to IAM Dashboard where you'll see a menu. Click on "Users" under the "Access management" section. See screenshot below for reference.
- Create User: Click on the yellow "Create user" button on the upper right(see screenshot below) to start creating a new IAM user.

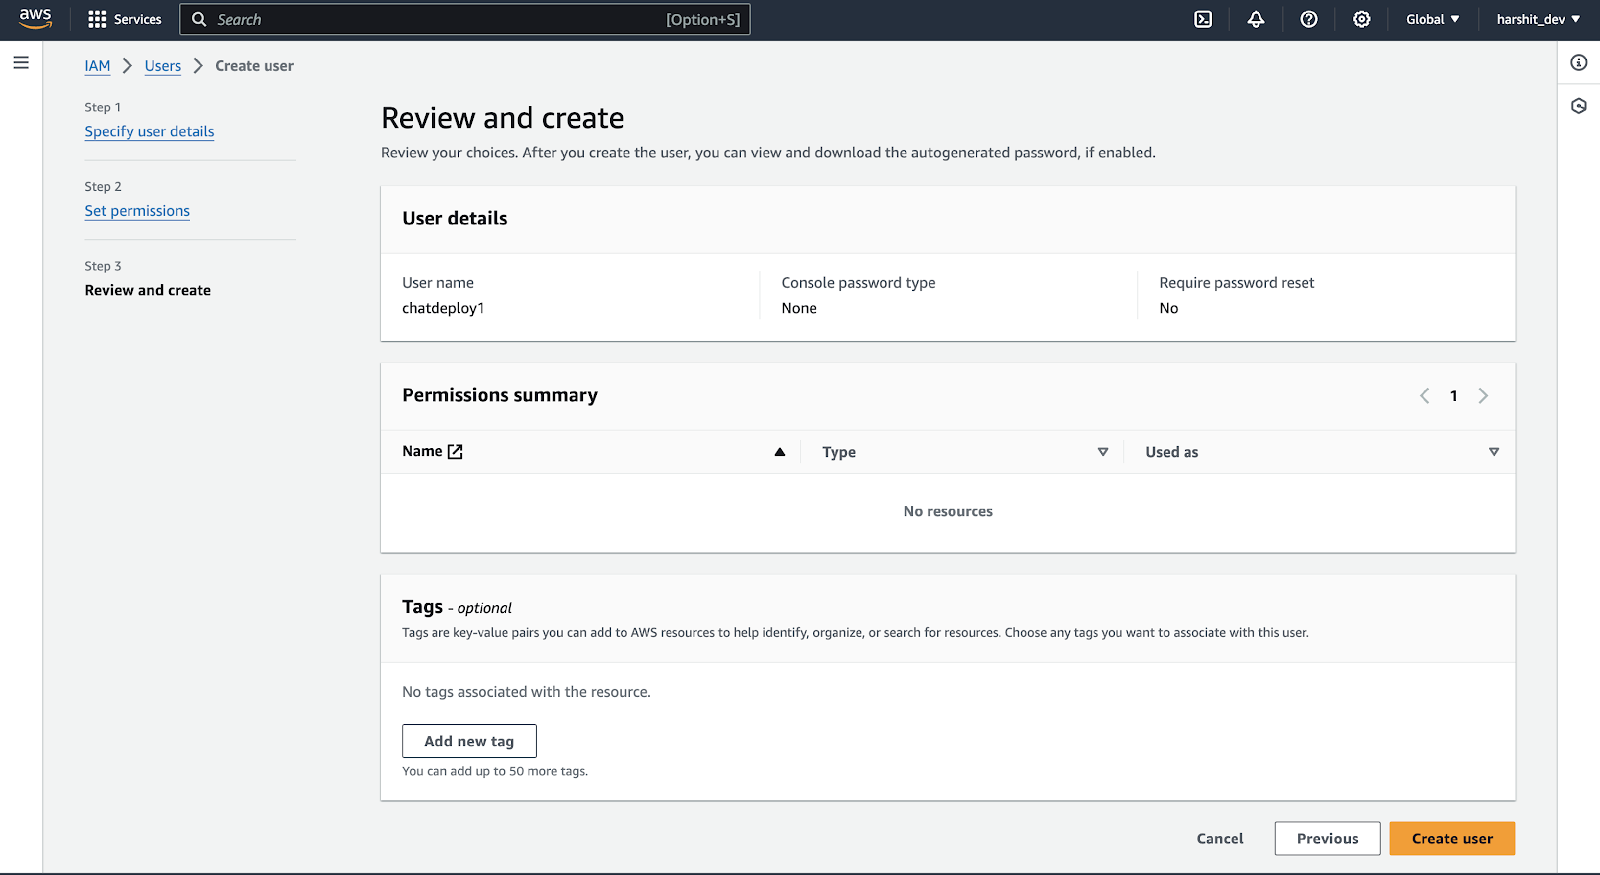
- Enter User Details: You'll be prompted to enter details for the new user. Provide a name for the user, set permissions(Add User to group). Once you're done, click "Create user" button on the lower right.See screenshot below for reference.
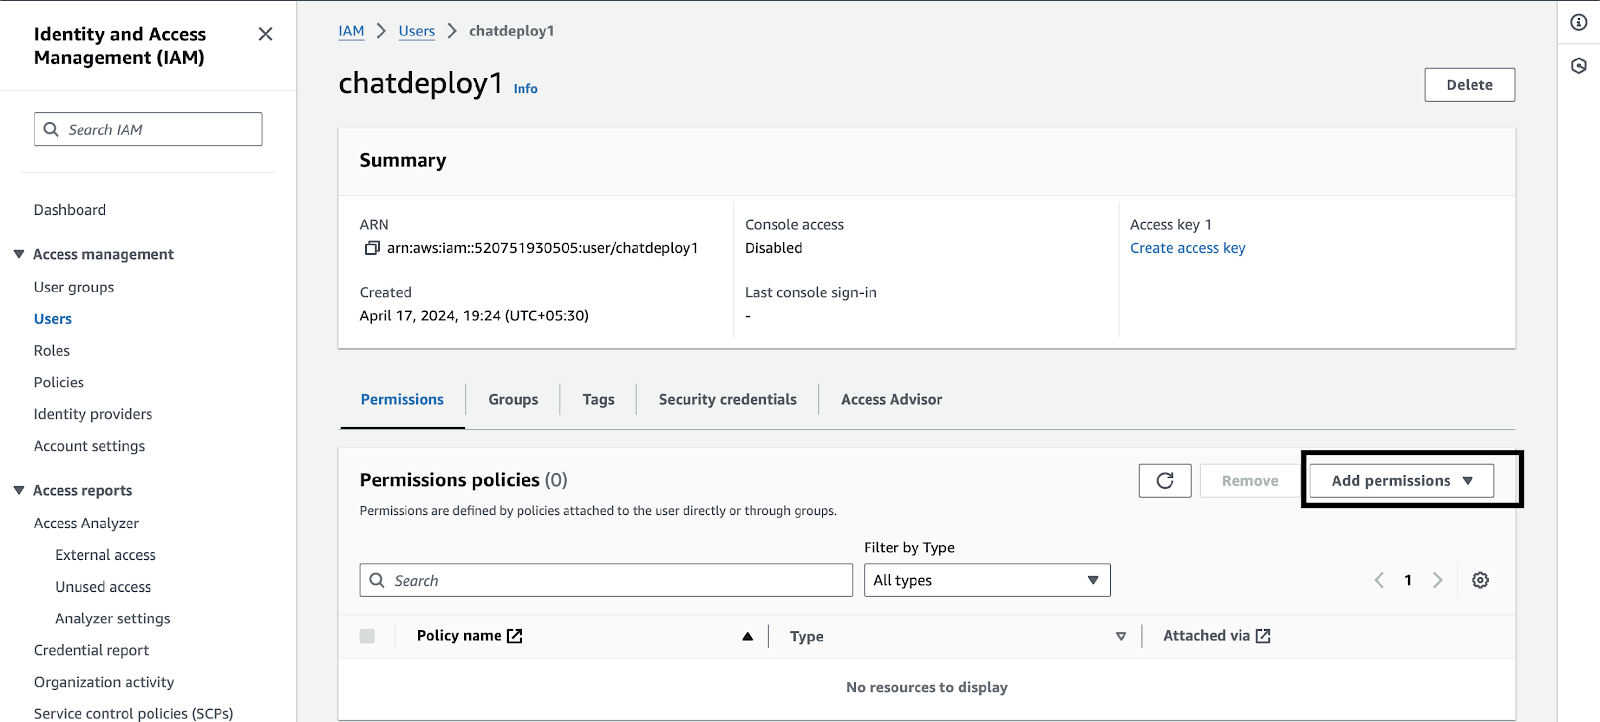
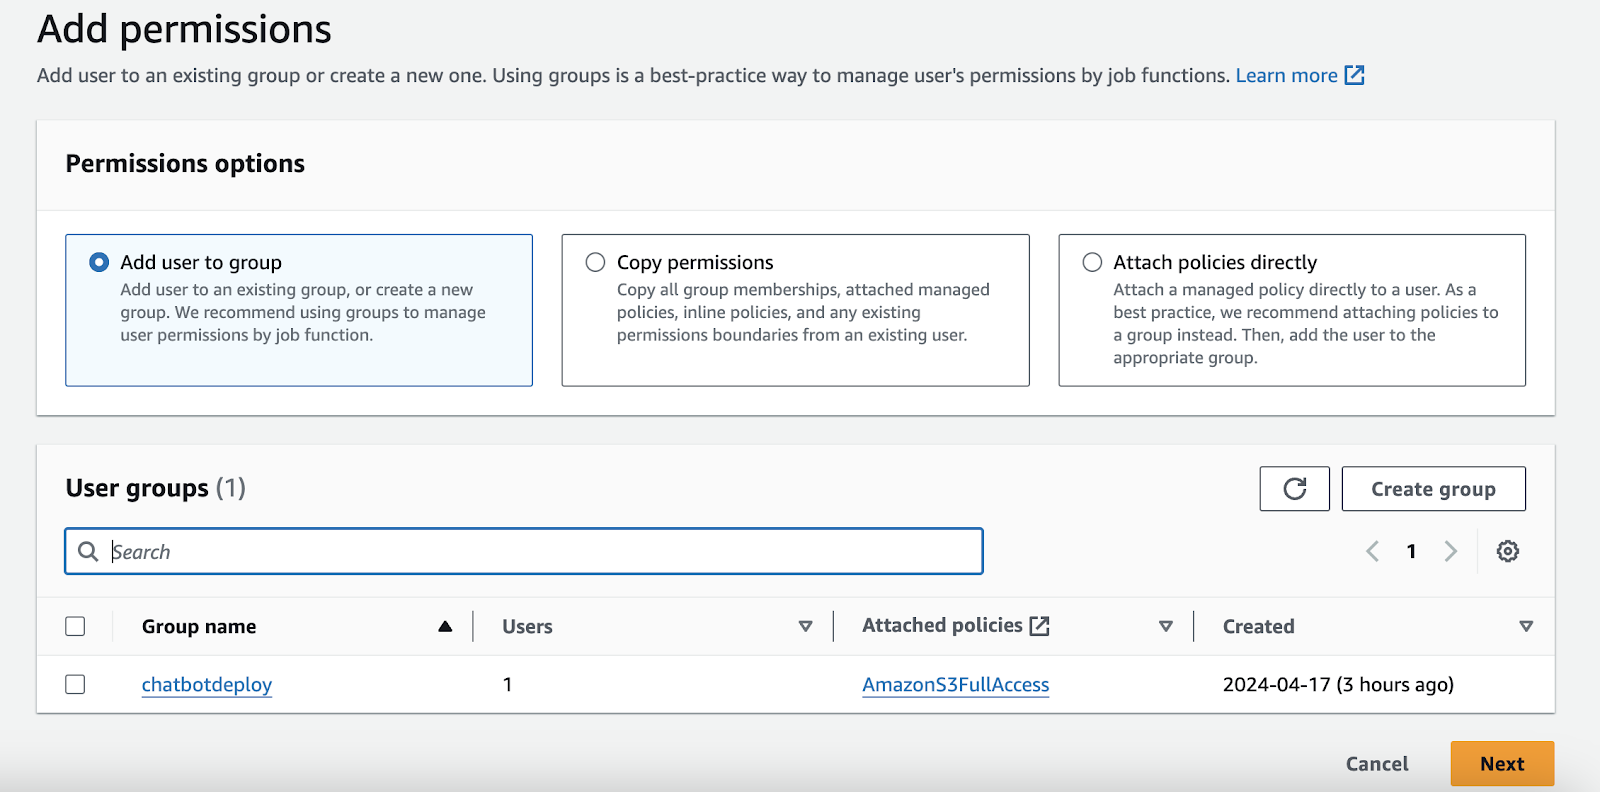
- Set EC2 permission for the user: Select the created user from the list and click on "Add permissions" button on the lower right. The button is highlighted in black box in screenshot below.
- Choose Add user to the group or create a group if there is no user group available.The "Create group" button is located on lower right in screenshot below.
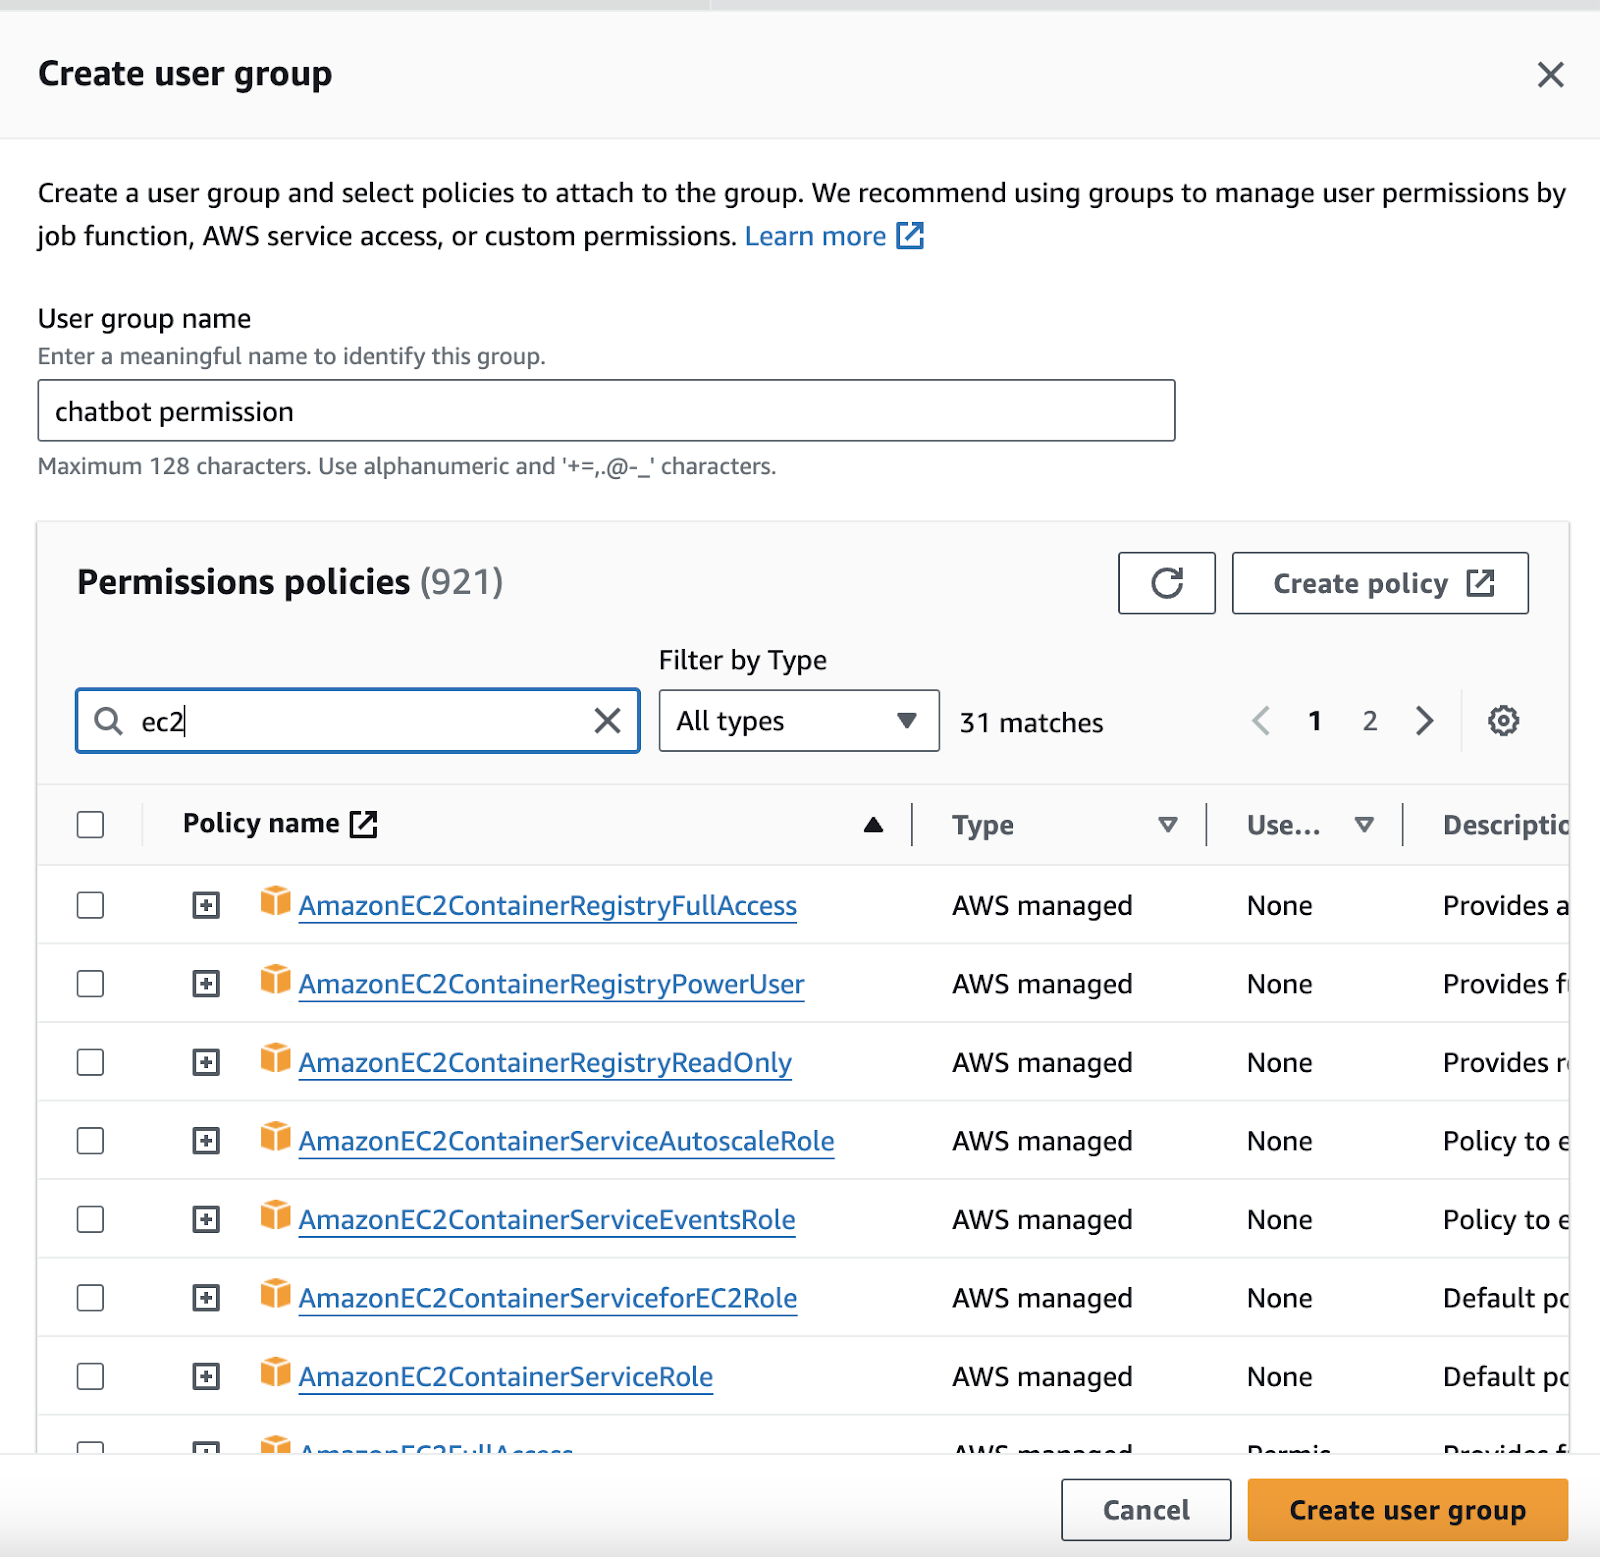
- Clicking on Create Group button will ask you to provide group name for AWS resource access. Checkmark AmazonEC2ContainerRegistryFullAccess from Permission Policies list and click on ‘Create user Group’ button. See screenshot below for reference.
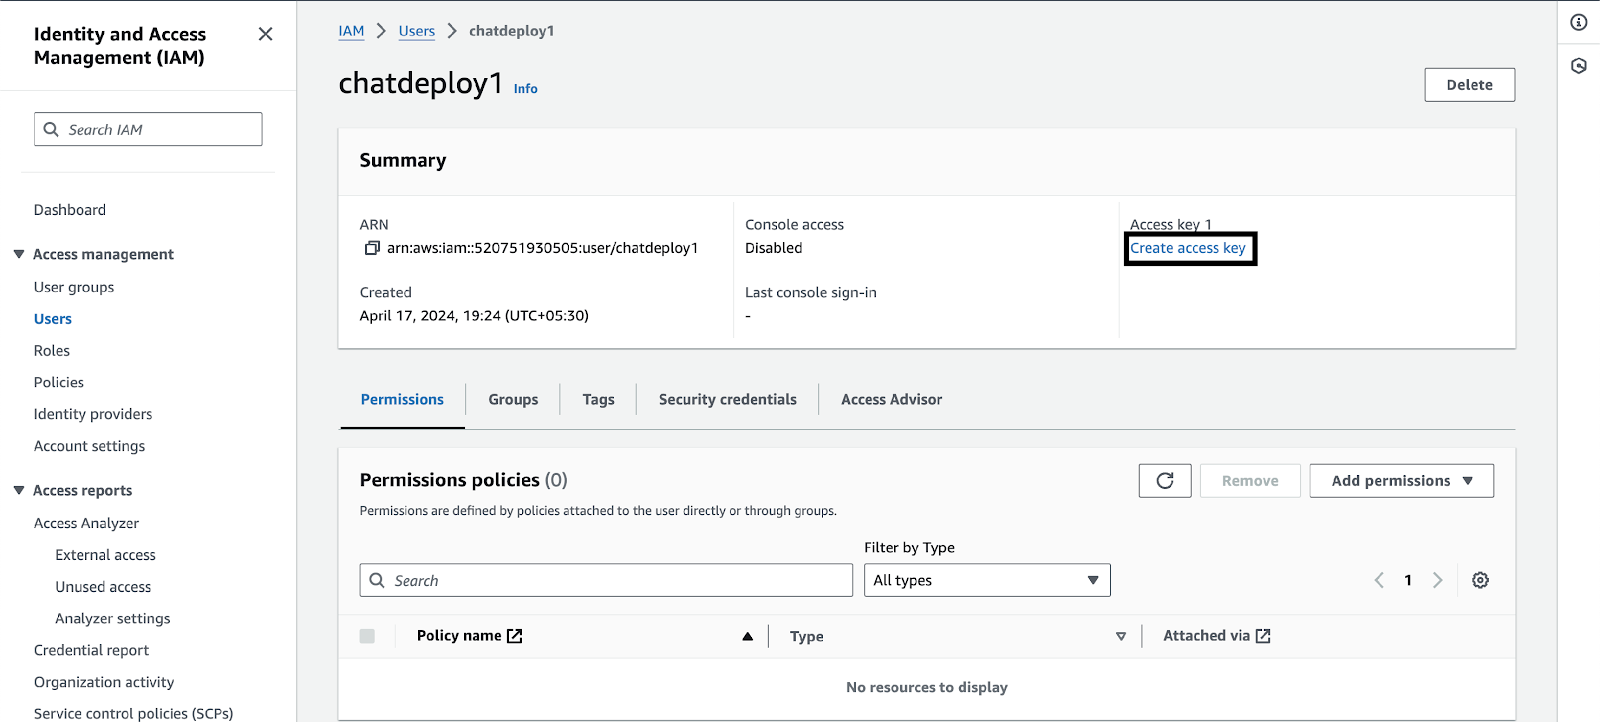
3. Generate AWS Access Key and Secret Key: In the AWS IAM Console, Select the created user from the list and click on "Create access key " button to create access key and secret key for the IAM user created earlier. The "Create access key" button is highlighted in black box in screenshot below.
4. Set up AWS CLI: Install AWS CLI on your local machine. For installation instructions specific to your operating system check this link.
Once AWS CLI is installed, you need to configure it with your AWS credentials and set the default region specific to your AWS account. You can do this by running the aws configure command in your terminal or command prompt.
- Provide AWS Access Key ID and Secret Access Key: You'll be prompted to enter your AWS Access Key ID and Secret Access Key. These are credentials associated with your AWS account. You can find them in the AWS Management Console under IAM (Identity and Access Management).
- Set Default Region: After entering the credentials, you'll be prompted to enter the default region. For ex: ap-northeast-1.
- Set Default Output Format (Optional): Finally, you can choose the default output format. The default is usually JSON.
Step 2: Set up GitHub Secrets and Github Actions for the Repository
- Go to your RAG chatbot example repository settings on GitHub, and navigate to the Secrets section. Add the AWS access key and secret key as repository secrets. See screenshot below for reference:
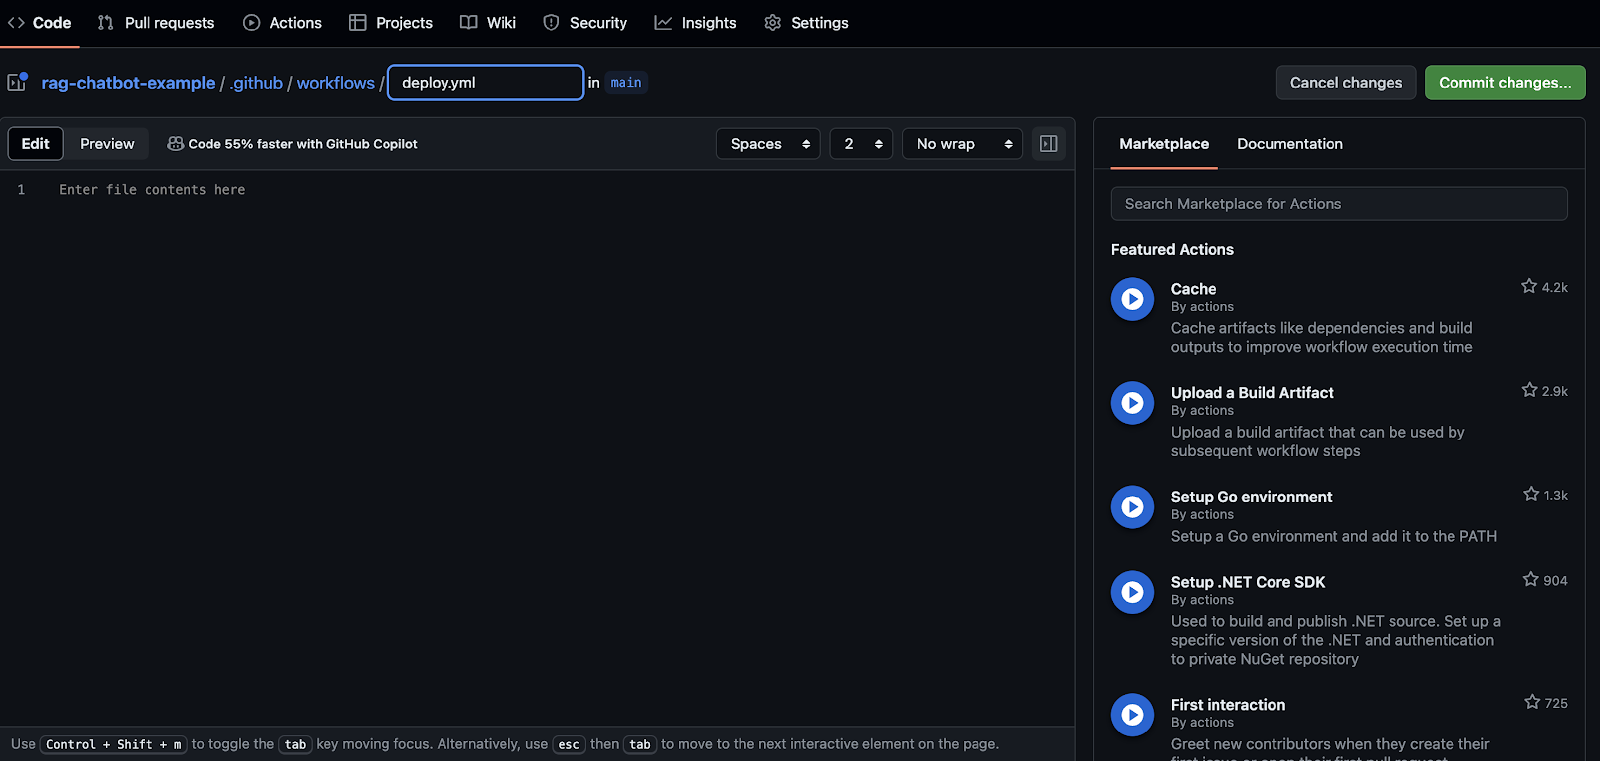
2. In your repository, create .github/workflows directory with an empty deploy.yaml file for implementing the GitHub Actions workflow later in the article.
Step 3: Configure OpenTofu
- Install OpenTofu CLI on your local machine using the instructions provided on the OpenTofu site (https://opentofu.org/docs/intro/install/).
- Configure OpenTofu: Open Terminal/Command Prompt and Create a directory named tofudemo and navigate to that that directory using the commands below:
mkdir tofudemo
cd tofudemo- Create a HCL configuration file named “main.tf” file which contains declaration for launching AWS EC2 cloud instance on which LLM app will be deployed.
terraform {
  required_providers {
    aws = {
      source  = "hashicorp/aws"
      version = "~> 4.0"
    }
  }
}

provider "aws" {
  region = "us-east-1"
  access_key = "AKIAXSPZ33SEY3IRIEW7"
  secret_key = "xxxx"
}
resource "aws_instance" "web" {
    ami = "ami-06e46074ae430fba6"
    instance_type = "t2.micro"

    tags = {
        Name = "hello-world"
    }
}
4. To initalize the HCL configuration run the command below.
tofu init
See code snippet below for reference.

5. Then run tofu plan command to ensure what AWS resources has to be created.
tofu plan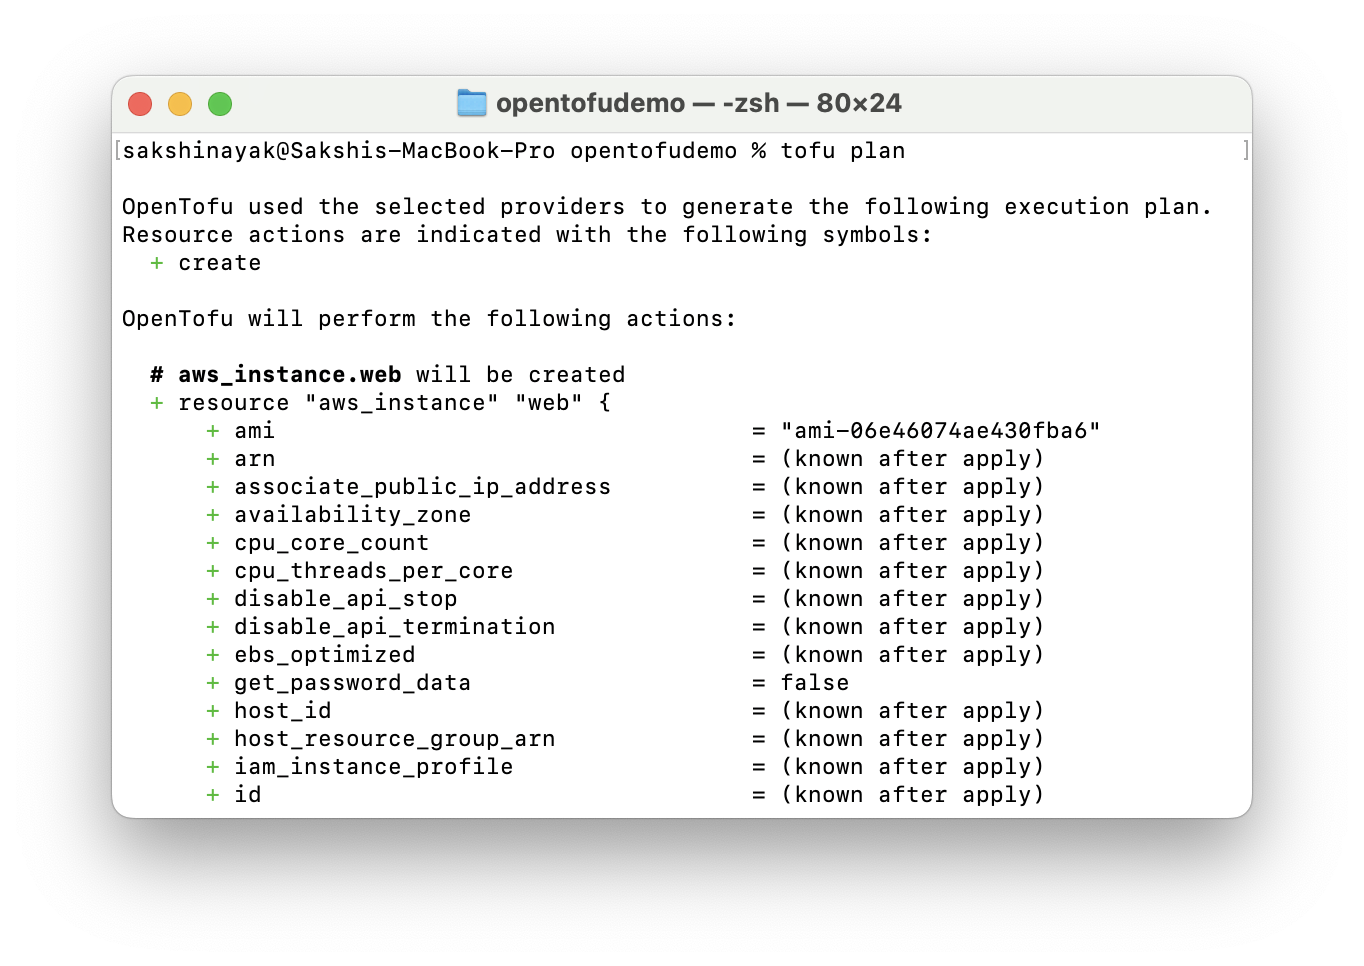
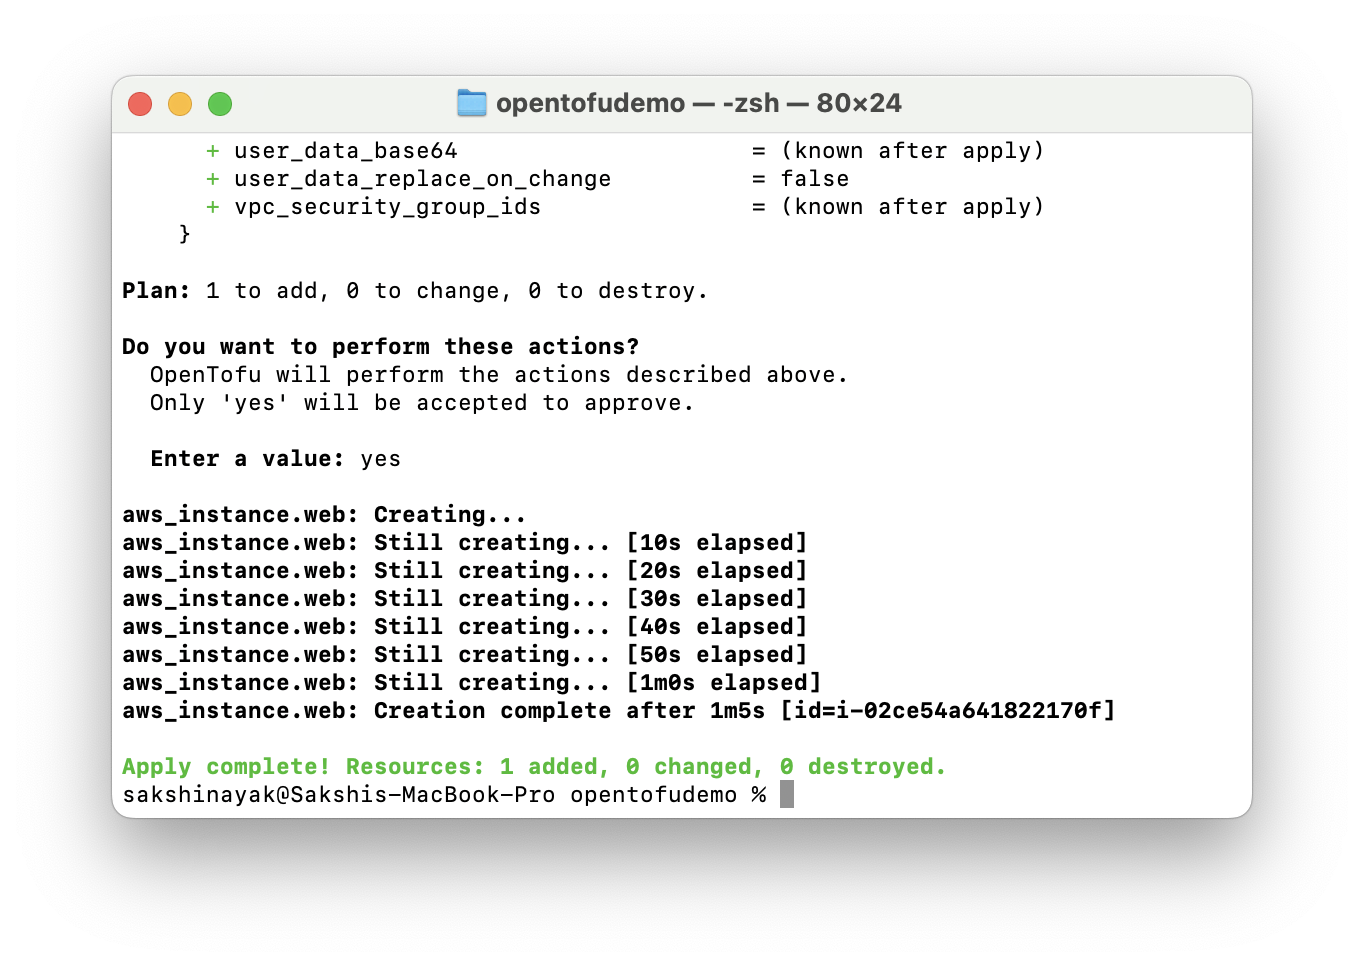
6. Finally run "tofu apply" command to create AWS resources.
7. Sign in to your AWS account and verify your AWS EC2 resources will be created with the provided specifications.
- Note: To terminate the AWS instance when it is not required just run the tofu destroy command.

8. Now SSH into AWS instance and delpoy the LLM chatbot app.
Step 4: Setup Digger to automate OpenTofu pull requests
- Push your OpenTofu Configuration to the LLM chatbot app repo .The OpenTofu configuration should be placed in the prod directory. Here’s a demo repo with prod directory to give you a perspective.
- Create a Digger token by signing up on cloud.digger.dev.
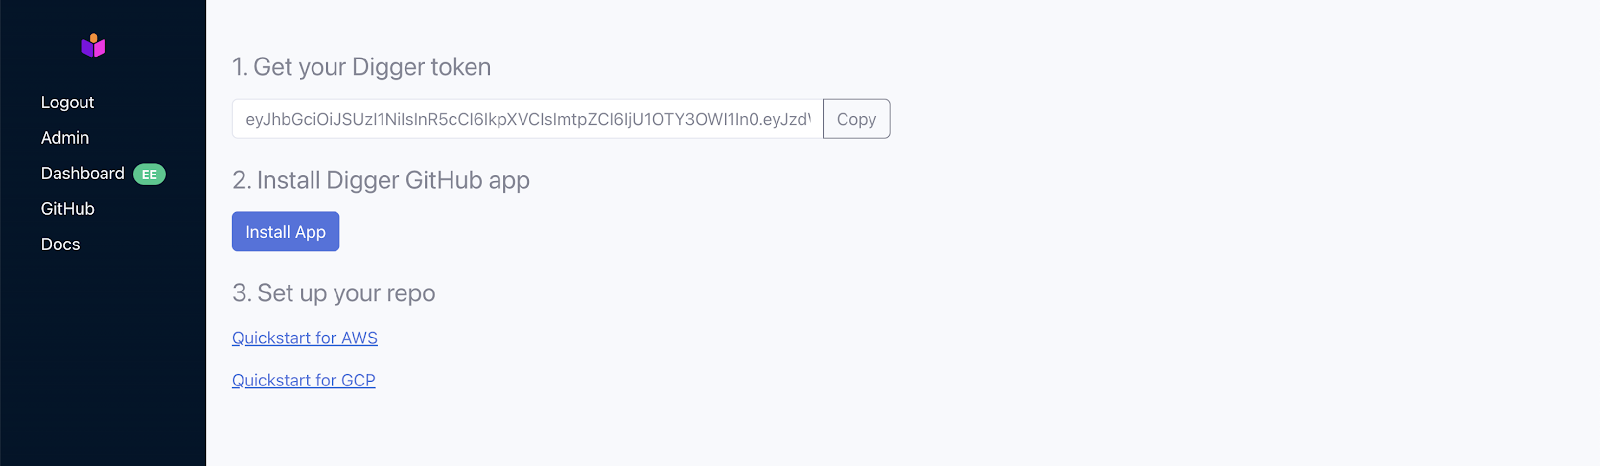
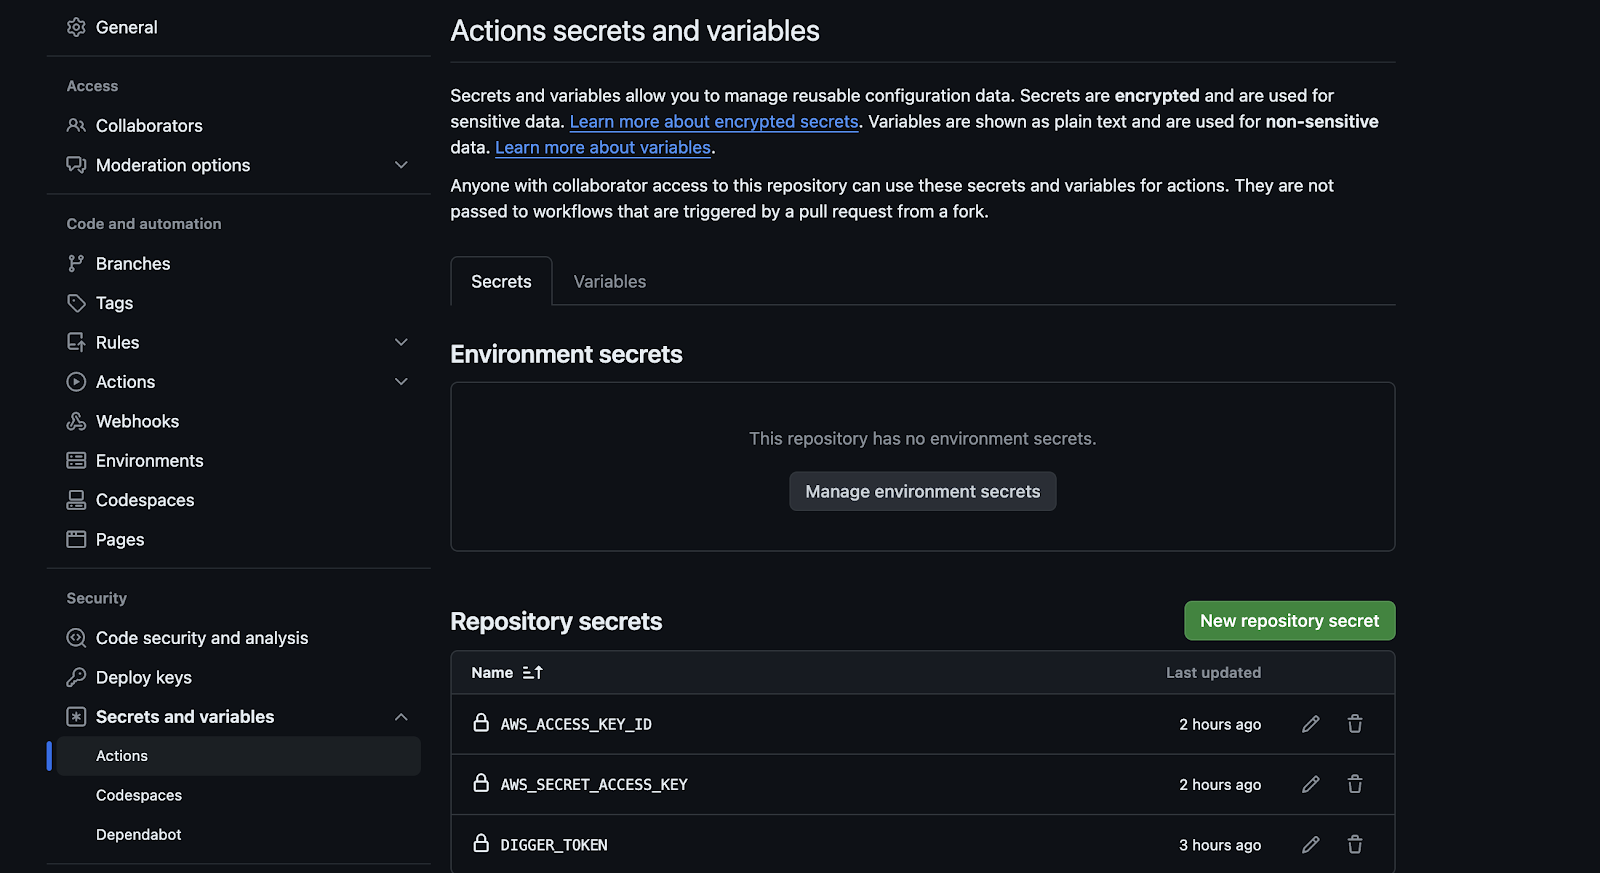
- Add the token as secrets in your LLM app GitHub repository settings.
- Go to Secrets and Variables -> Actions -> New repository secret
- AWS_ACCESS_KEY_ID and AWS_SECRET_ACCESS_KEY (you can also use OIDC)
- DIGGER_TOKEN - your Digger token (cloud or self-hosted)
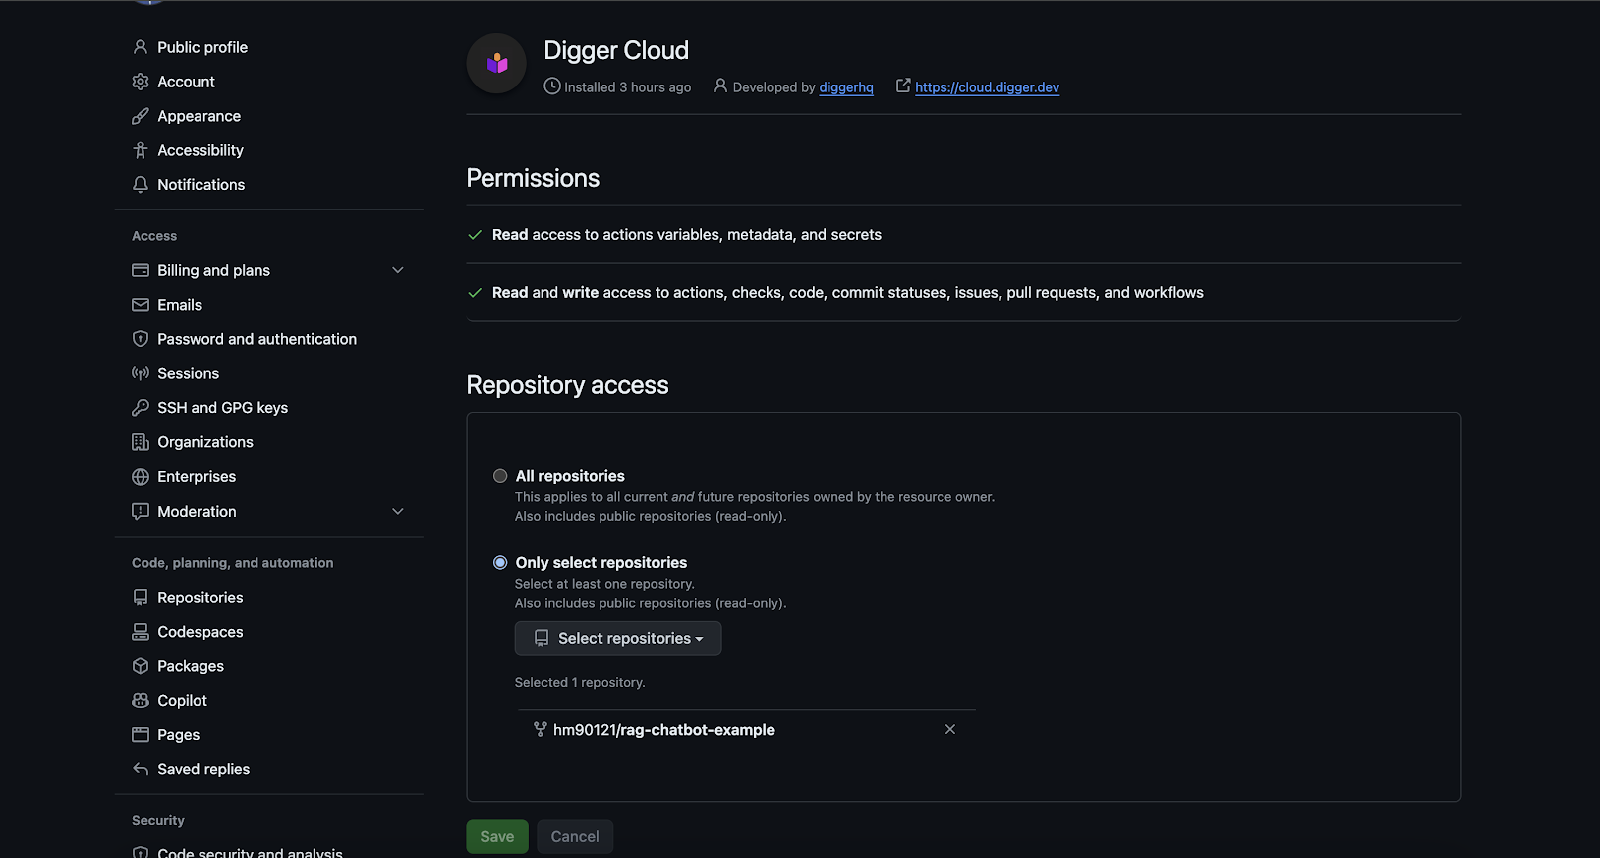
4. Install the Digger GitHub App from cloud.digger.dev and give it access to your repo.
5. Create digger.yml file with code configuration below and place it at the root level of your repository. Assuming your OpenTofu code is in the prod directory:
projects:
- name: production
  dir: prod
6. Now create a github actions workflow file named digger_workflow.yml (name is important!) with the configuration below and place it at .github/workflows/digger_workflow.yml
  name: Digger Workflow

  on:
  workflow_dispatch:
  inputs:
    id:
      description: 'run identifier'
      required: false
    job:
      required: true
    comment_id:
      required: true
  jobs:
  digger-job:
  runs-on: ubuntu-latest
  permissions:
    contents: write      # required to merge PRs
    actions: write       # required for plan persistence
    id-token: write      # required for workload-identity-federation
    pull-requests: write # required to post PR comments
    statuses: write      # required to validate combined PR status

  steps:
    - uses: actions/checkout@v4
    - uses: diggerhq/digger@v0.4.13
      with:
        setup-aws: true
        aws-access-key-id: ${{ secrets.AWS_ACCESS_KEY_ID }}
        aws-secret-access-key: ${{ secrets.AWS_SECRET_ACCESS_KEY }}
        disable-locking: true
        digger-hostname: 'https://cloud.digger.dev'
        digger-organisation: 'digger'
        digger-token: ${{ secrets.DIGGER_TOKEN }}
      env:
        GITHUB_CONTEXT: ${{ toJson(github) }}
        GITHUB_TOKEN: ${{ secrets.GITHUB_TOKEN }}
This file defines a simple workflow that
- Checks out repository using Github’s official Checkout action
- Runs Digger. Note that DIGGER_TOKEN needs to be set as a secret in Actions (either repository secret, or environment secret), you also need to set AWS_ACCESS_KEY_ID and AWS_SECRET_ACCESS_KEY parameter. OIDC is also supported if you prefer that route
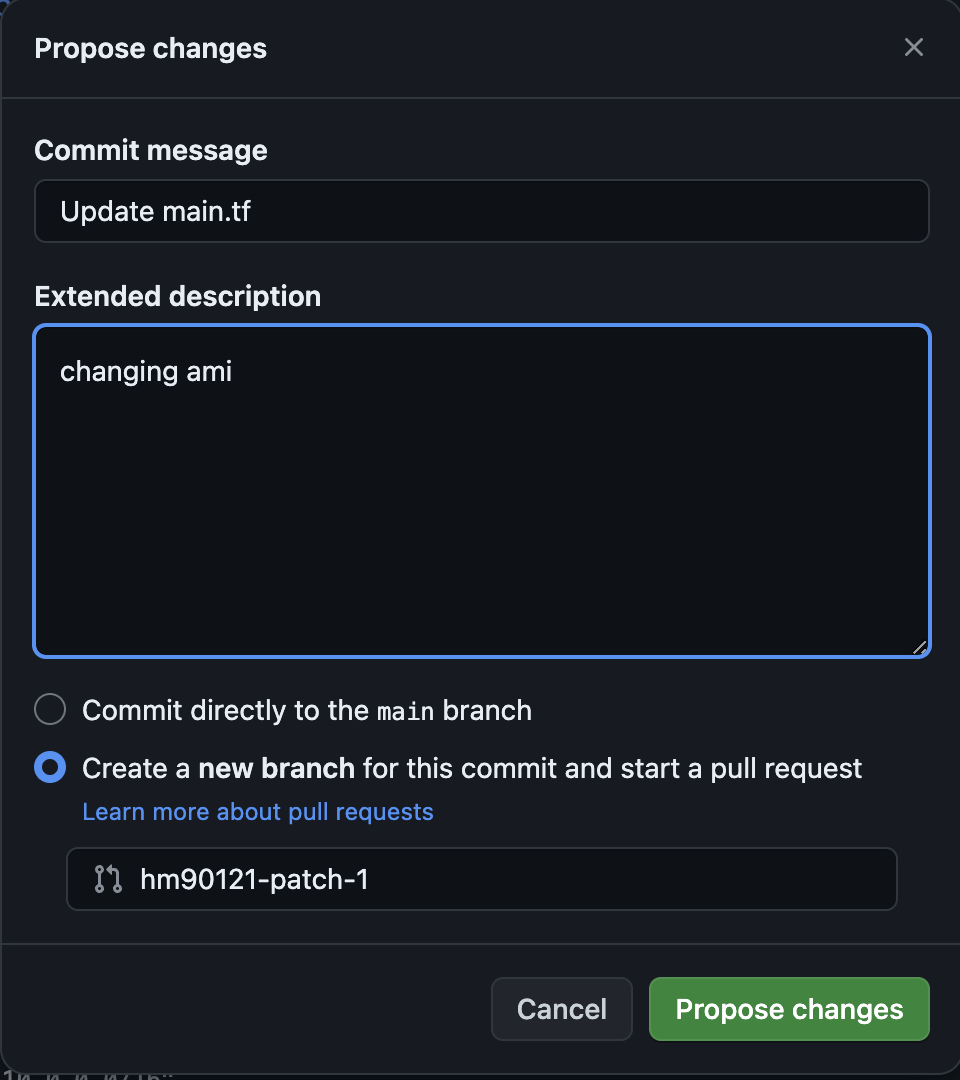
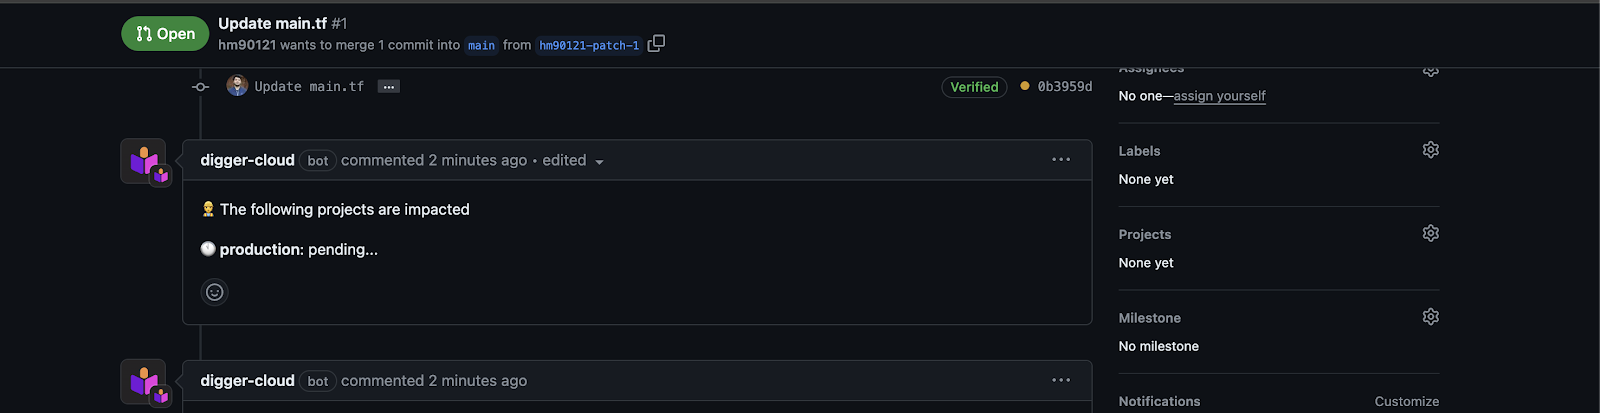
7. Now to check whether digger is working correctly make any changes to OpenTofu code under prod directory and raise a PR. See screenshot below.
8. An action run should start (you can see log output in Actions). After some time you should see output of digger added as a comment to your PR.
Conclusion
We have explored the open-source GitOps for OpenTofu model via Digger for deploying RAGs chatbot to AWS EC2 in this article. For automating and meeting AWS infrastructure demands for the app infrastructure as code model is implemented via Opentofu which allows blueprint of your infrastructure to be shared and re-used.
We hope you find this article helpful. Thank you for reading until the end. Before you go, we just wanted to share the following:We’re building Digger as an Open Source Tool that helps you orchestrate Terraform and OpenTofu within CI/CD systems such as GitHub Actions while providing RBAC via OPA, Drift Detection and Concurrency with a self hostable orchestrator backend. Would love your feedback!